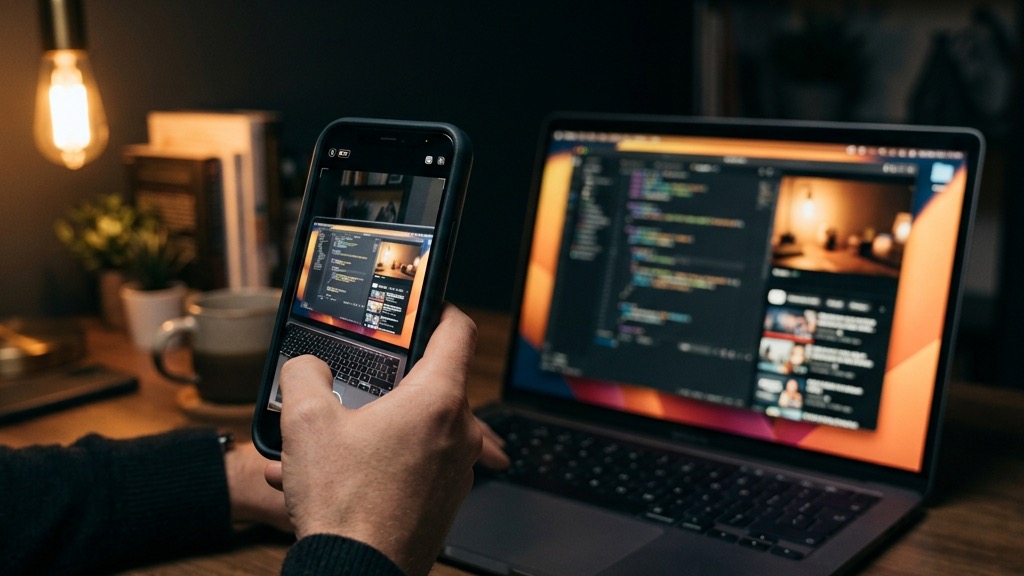
Record your product on the device it actually runs on, in one unbroken take, and ignore the aspect ratio while you do it. That is most of the answer. The rest is knowing which ten seconds are worth keeping, and knowing the one situation where a rougher shot beats a clean one.
There are three cases worth separating: a mobile app, a web app or website, and the handheld shot where you point a phone at your own screen. Each fails in a different way, and all three are fixable with about a minute of setup.
Start with a clean screen recording
The default is the screen recorder built into the operating system. It captures at the device's native resolution, it never shakes, and it gives you nothing to fight: no glare, no reflections, no banding.
Aspect ratio is the part founders overthink. A desktop recording comes out wide at 16:9, a vertical feed wants 9:16, and this is exactly where a lot of advice goes sideways and tells web app owners to prop a phone on a tripod and film their monitor to get a tall frame. You do not need to do that. Reframing a wide recording to vertical is a solved problem, and ClipMyApp does it to your upload automatically, following the part of the screen that actually matters instead of centre-cropping and hoping. Record wide, record at the best quality you have, and let the reframe happen afterwards.
It also means you can start from nothing. Tools built to slice a long video into shorts need an hour of podcast or webinar before they can give you a minute, which is not much use if you have shipped an app and never turned a camera on. That difference is worth understanding before you pick a workflow, and the breakdown of what changes when your source is the product instead of a long recording spells it out.
Recording a mobile app
On iPhone, the recorder lives in Control Center. If the Record button is not there yet, add it in Settings, then swipe down from the top-right corner, tap it, and wait out the three-second countdown before you do anything you want on camera. The file lands in Photos when you stop. Apple's own walkthrough covers the button and the two ways to stop a recording.
One real gap: iOS does not draw your taps. A viewer sees the screen change with no visible cause, which reads as a video glitch rather than an interaction. Slow your finger down and pause a beat before each tap, so the motion of the UI makes the cause obvious.
Android does have a proper fix for this, and it is buried. Tap Build Number seven times to turn on developer options, then switch on Show taps. Google documents it under the Input section, and describes it as putting a circle under your finger that follows you around the screen. Turn it on before you record anything you intend to publish.
Three things to do before you hit record, in any mobile app:
- Turn on a Focus mode or Do Not Disturb. One notification banner sliding into frame costs you the whole take, and it will always happen on the take you liked.
- Check the status bar. Battery percentage, a red low-battery icon and a missing signal all sit in the top of every single frame you shoot. Charge the phone first.
- Use real data. Placeholder rows and a user called Test User 3 tell a viewer that nobody uses this yet. Populate the account like a real one before recording.
Recording a web app or website
On a Mac, press Shift-Command-5, choose Record Selected Portion, and drag the box around the browser window only. On Windows, the Game Bar records the active window with Windows-Alt-R. Either way, record the window, not the whole desktop: a full-desktop capture drags in your dock, your wallpaper and whatever else is open, and every pixel of that is wasted once the frame goes vertical.
Then clean the frame itself. Record in a fresh browser profile or a guest window so there is no bookmarks bar, no row of extension icons, and no tab strip advertising the other twelve things you have open. It takes fifteen seconds and it is the single biggest difference between footage that looks like a product and footage that looks like a support ticket.
Two habits that matter more on web than on mobile:
- Zoom the page to about 125% before you record. Body text sized for a laptop becomes unreadable once a wide frame is cropped into a tall one and viewed on a phone. Oversize it at capture time and it survives the crop.
- Move the cursor deliberately. A cursor that darts across the screen is invisible at short-form pacing. Move slowly, stop moving while something loads, and let the pointer rest on the thing you want people to look at.
Do not resize the window mid-take. A resize halfway through means the useful region moves, and the clip has to be cut at that point whether the cut belongs there or not.
The handheld shot: filming your own screen
Now the exception. Sometimes the right shot really is a phone in your hand, pointed at your laptop, with your finger moving across the screen while you talk over it.
It does not have a settled name. Creators describe it rather than label it: filming your screen, shooting the monitor, the handheld demo. There is no accepted term to search for, which is part of why the technique gets copied constantly and almost never gets any craft advice attached to it.
What it buys you is register, not quality. A clean capture reads as a product demo. A hand, a room, a slightly crooked frame and a finger landing on a button reads as a person showing you something they found. That second register is what a recommendation post is made of, and it is the one thing a flawless screen recording cannot fake.
So use it deliberately. The handheld shot fits a reaction, a recommendation, or a single "look at this" moment. A clean capture fits anything where the viewer has to follow a sequence of steps. Getting this backwards is the common mistake: a handheld shot of a six-step workflow is unreadable, and a pristine capture of a one-line "this exists" post looks like an ad, which is the one thing the feed reliably punishes.
Shooting it without the banding
Filmed screens go wrong in a specific, physical way. Three things happen at once: the screen's subpixel grid interferes with the camera's own sensor grid, the display is being redrawn constantly at its refresh rate, and the phone's rolling shutter reads the sensor row by row and so catches different parts of that redraw at different instants. The result is the shimmering pattern and the rolling dark bands, and the mechanism behind it is well documented.
Four fixes, in the order worth trying:
- Switch to the telephoto lens and step back. Using the 2x or 3x lens from further away changes how the camera samples the screen's grid, which is usually enough on its own.
- Change the angle slightly. A few degrees off perpendicular shifts how the two grids overlap. It also kills the reflection of your own face in the panel.
- Slow the shutter down. A slower shutter, in the region of 1/30 or 1/60, catches a fuller cycle of the screen refreshing instead of freezing one slice of it. On a phone this mostly means not filming in a bright room that pushes the shutter up.
- Turn HDR off. HDR reacts to the screen as a light source and swings the exposure around mid-shot, which looks like the footage is pulsing.
Then set the room: screen brightness high, overhead lights off or behind you, and nothing bright directly facing the panel. Hold the phone vertically. Point at things before you say them, not after.
What makes ten seconds usable
Length is where most raw footage is wasted. The usable unit is roughly ten to fifteen seconds of one thing happening, not a two-minute tour of the whole product.
Aim for a clip that does four things. It shows a real action with real data. It pauses briefly on the screen that matters instead of scrolling past it. It is comprehensible with the sound off, because most of the feed is watched on mute. And it ends on the strongest visual moment rather than on you navigating back to a home screen.
That last one gets ignored constantly. Whatever is on screen in the final frame is what the viewer is left holding, so stop recording on the result, not on the tidy-up afterwards. Everything before and after can be trimmed later; a take that never captured the payoff cannot be rescued.
Where recordings usually die
Most unusable footage fails for one of five reasons, and all five are decided before you press record:
- A notification, a low battery icon, or a personal name visible in the frame.
- Placeholder data, which quietly tells the viewer the product has no users.
- Loading states with nothing happening, which are dead air at short-form pace.
- Text too small to read once the frame is cropped vertical and played on a phone.
- The take ending after the payoff rather than on it.
None of those are editing problems. They are setup problems, which is the good news: a second take with the same product and thirty seconds of preparation usually fixes all five at once.
Record once, cut later
The workflow that holds up is boring. Record one clean, wide, unhurried take on whatever device the product runs on. Shoot a handheld version separately when the post calls for that register, not as a substitute for the clean one. Keep both. A single good recording is enough raw material for weeks of posts, because the cutting, the reframing, the captions and the hooks all happen after the fact.
If you want that second half handled for you, ClipMyApp turns one upload into a batch of finished vertical posts you approve before anything publishes. You can see what the plans include, or browse the comparisons with other tools in this space if you are still working out which shape of tool you need.